Wet sanding is exactly what it sounds like: sanding with water. It may sound risky to use sandpaper on your car, and that’s because it is. However, there are times when it’s very useful for getting rid of pesky paint scratches at a very low cost. You just need to know when wet sanding is helpful, when it’s not, and how to do it correctly.
What is Wet Sanding?
The most important thing to know about wet sanding is that it’s a subtractive process. It may sound obvious, but this means that it’s taking away paint. Despite how obvious that may seem, I’ve still seen a lot of people try to wet sand scratches that are deeper than the paint level (to the metal). Wet sanding is NOT helpful if there is no paint left under the scratch.
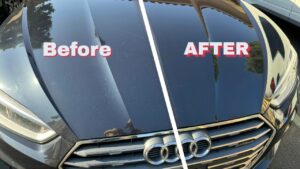
The goal of wet sanding is to smooth out the roughness of a shallow scratch (a scratch that is only as deep as the clear coat or paint layer). When your vehicle’s paint is scratched, it leaves tiny, rough divots. When the light hits the uneven surface, it stands out because the light is bouncing back in all different directions compared to the unscratched surface around it. Ideally, you can wet sand the scratch to make it smooth again and then buff it out so that it shines and blends back in to the surrounding paint!
The danger with wet sanding is that you can go too far and burn the paint. This happens when the scratch was so deep that there was no paint left under it to smooth out, you sand too much and remove what was left of the paint layer, or you start to remove too much of the clear coat around the scratch, making the scratch wider. Burning the paint will require a more pricey repair.
When To Wet Sand
To sum up the previous section, you should only wet sand a scratch when there is still paint under the scratch.
There are 3 layers on top of the metal: primer, paint, and then clear coat on the top.
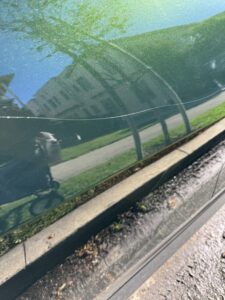
You can tell if the scratch is just in the clear coat by wetting the scratch. If it disappears for a few seconds when it’s wet, that usually means it’s just in the very top layer. This type of scratch will be easily removed with a little bit of wet sanding and buffing.
If the scratch doesn’t disappear when wet, but looks white, it is most likely down to the paint layer. If you can’t see metal, wet sanding should still be an option. Be careful though, it may be hard to tell exactly how deep into the paint layer the scratch is. If you can’t tell, ask a professional for help or send us a message.
Never wet sand if you can see metal! The scratch is too deep to be helped with sanding, and now requires a paint job – either touch-up or respray. See our blog post here for more info on that type of repair.
Before You Try DIY Wet Sanding
We highly recommend that you watch our YouTube video on wet sanding before attempting this on your own, especially if you’ve never done anything like it before. PaintCraft owner, Steve Bode, goes into a bit more detail and offers some helpful tips on the process. You can also do more research elsewhere or hire a professional to do it for you. If you have any questions, feel free to reach out to us!
How to Wet Sand
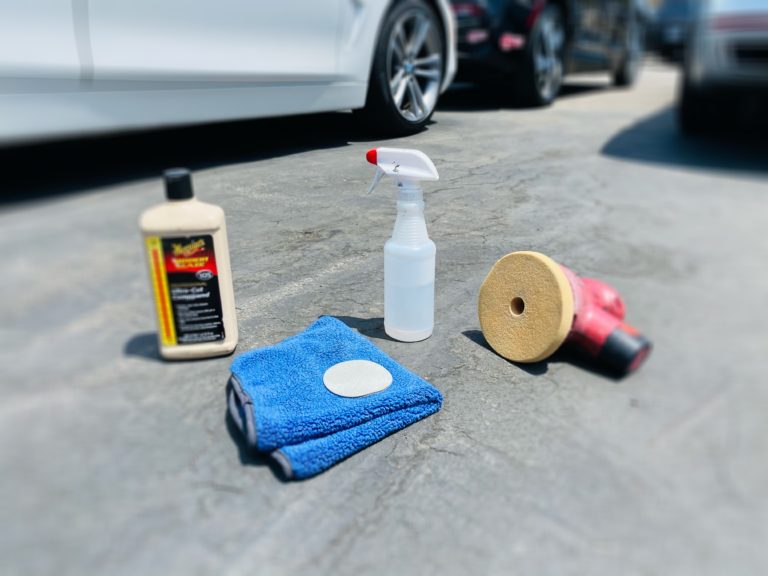
You’ll need the following materials:
- Sandpaper (start with 3000 grit or higher)
- We like to use these: Round Sanding Discs – 3000 Grit
- Spray bottle filled with water
- Microfiber cloth
- Orbital buffer
- Buffing compound
Wet Sanding Steps
- Spray the scratch and the sandpaper generously with water.
- Gently start to sand the scratch, careful to only sand the scratch itself, rather than the surrounding paint, as much as possible.
- Start with a light pressure and only sand for about 10 seconds. Keep in mind that you’ll need to buff for about 2 minutes for every 30 seconds of sanding. This changes drastically if you use lower grit sandpaper, as it’s more coarse. You may need to buff longer for darker colored cars.
- After you’ve sanded for 10 seconds, use water and the buffing compound on your buffer to buff out the scratch for 45 seconds – 1 minute. Slowly move the buffer back and forth across the scratch, getting different angles.
- Wipe the area clean with your microfiber cloth to see how much progress has been made.
- Continue to work in 10-second sanding increments, keeping the area wet with your spray bottle, and then buff for about 1 minute.
- A small scratch shouldn’t take much more than 1 minute of sanding total.
- Once you get the feel for it, you can try sanding for a little longer at a time if necessary. If you don’t feel comfortable, or suspect you’re burning the paint, stop immediately! Buff it out and find a professional to help you.